How to Add Table Booking to Your Shopify Store in One Afternoon
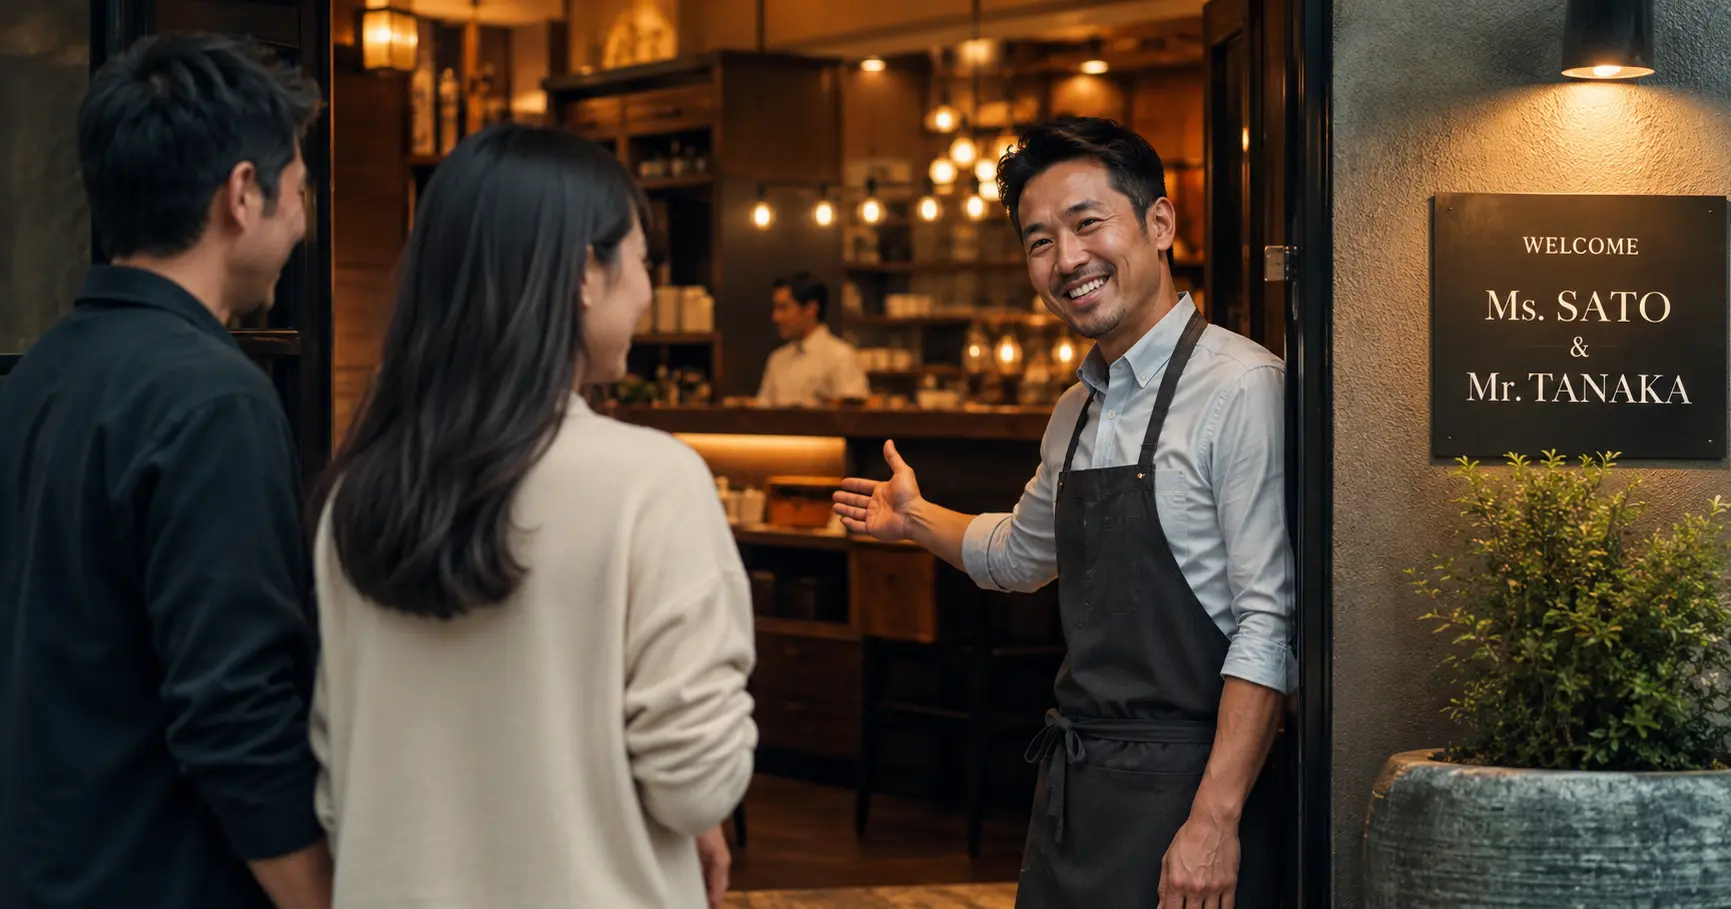
Your Shopify store sells food. But can it sell a seat?
Most restaurant Shopify stores do a great job showing the menu, telling the story, and driving foot traffic. But when a guest wants to book a table, they hit a dead end.
No booking form. No confirmation. No system.
They either call, which not every guest wants to do, or they leave and book somewhere else.
Adding table booking to your Shopify store does not require a developer, a new website, or a complicated setup. With the right app, you can go from zero to taking confirmed reservations in a single afternoon.
This guide walks you through every step.
What you will learn:
- What you need before you start (a quick 5-minute checklist)
- How to install and configure Reservics step by step
- Common setup mistakes and how to avoid them
- What your first confirmed booking will look like
💡 Short Answer: How to Add Table Booking to Shopify
Install a restaurant booking app like Reservics from the Shopify App Store, set up your tables and time slots, configure your deposit or cancellation rules, then add the booking widget to your storefront. Most restaurants complete the full setup in under 2 hours.
What You Need Before You Start
Before you open the app, spend 5 minutes getting these ready. It will make the setup much faster.
| What | Why You Need It |
|---|---|
| Your table layout | How many tables, what capacity per table |
| Opening hours | Which days and time slots accept bookings |
| Booking rules | Deposit yes or no, cancellation window |
| Contact email | Where guest confirmations send from |
| Shopify admin access | To install the app and edit your theme |
If you have these ready, the rest takes under 2 hours.
Step-by-Step: How to Add Table Booking to Your Shopify Store
Step 1. Install Reservics from the Shopify App Store
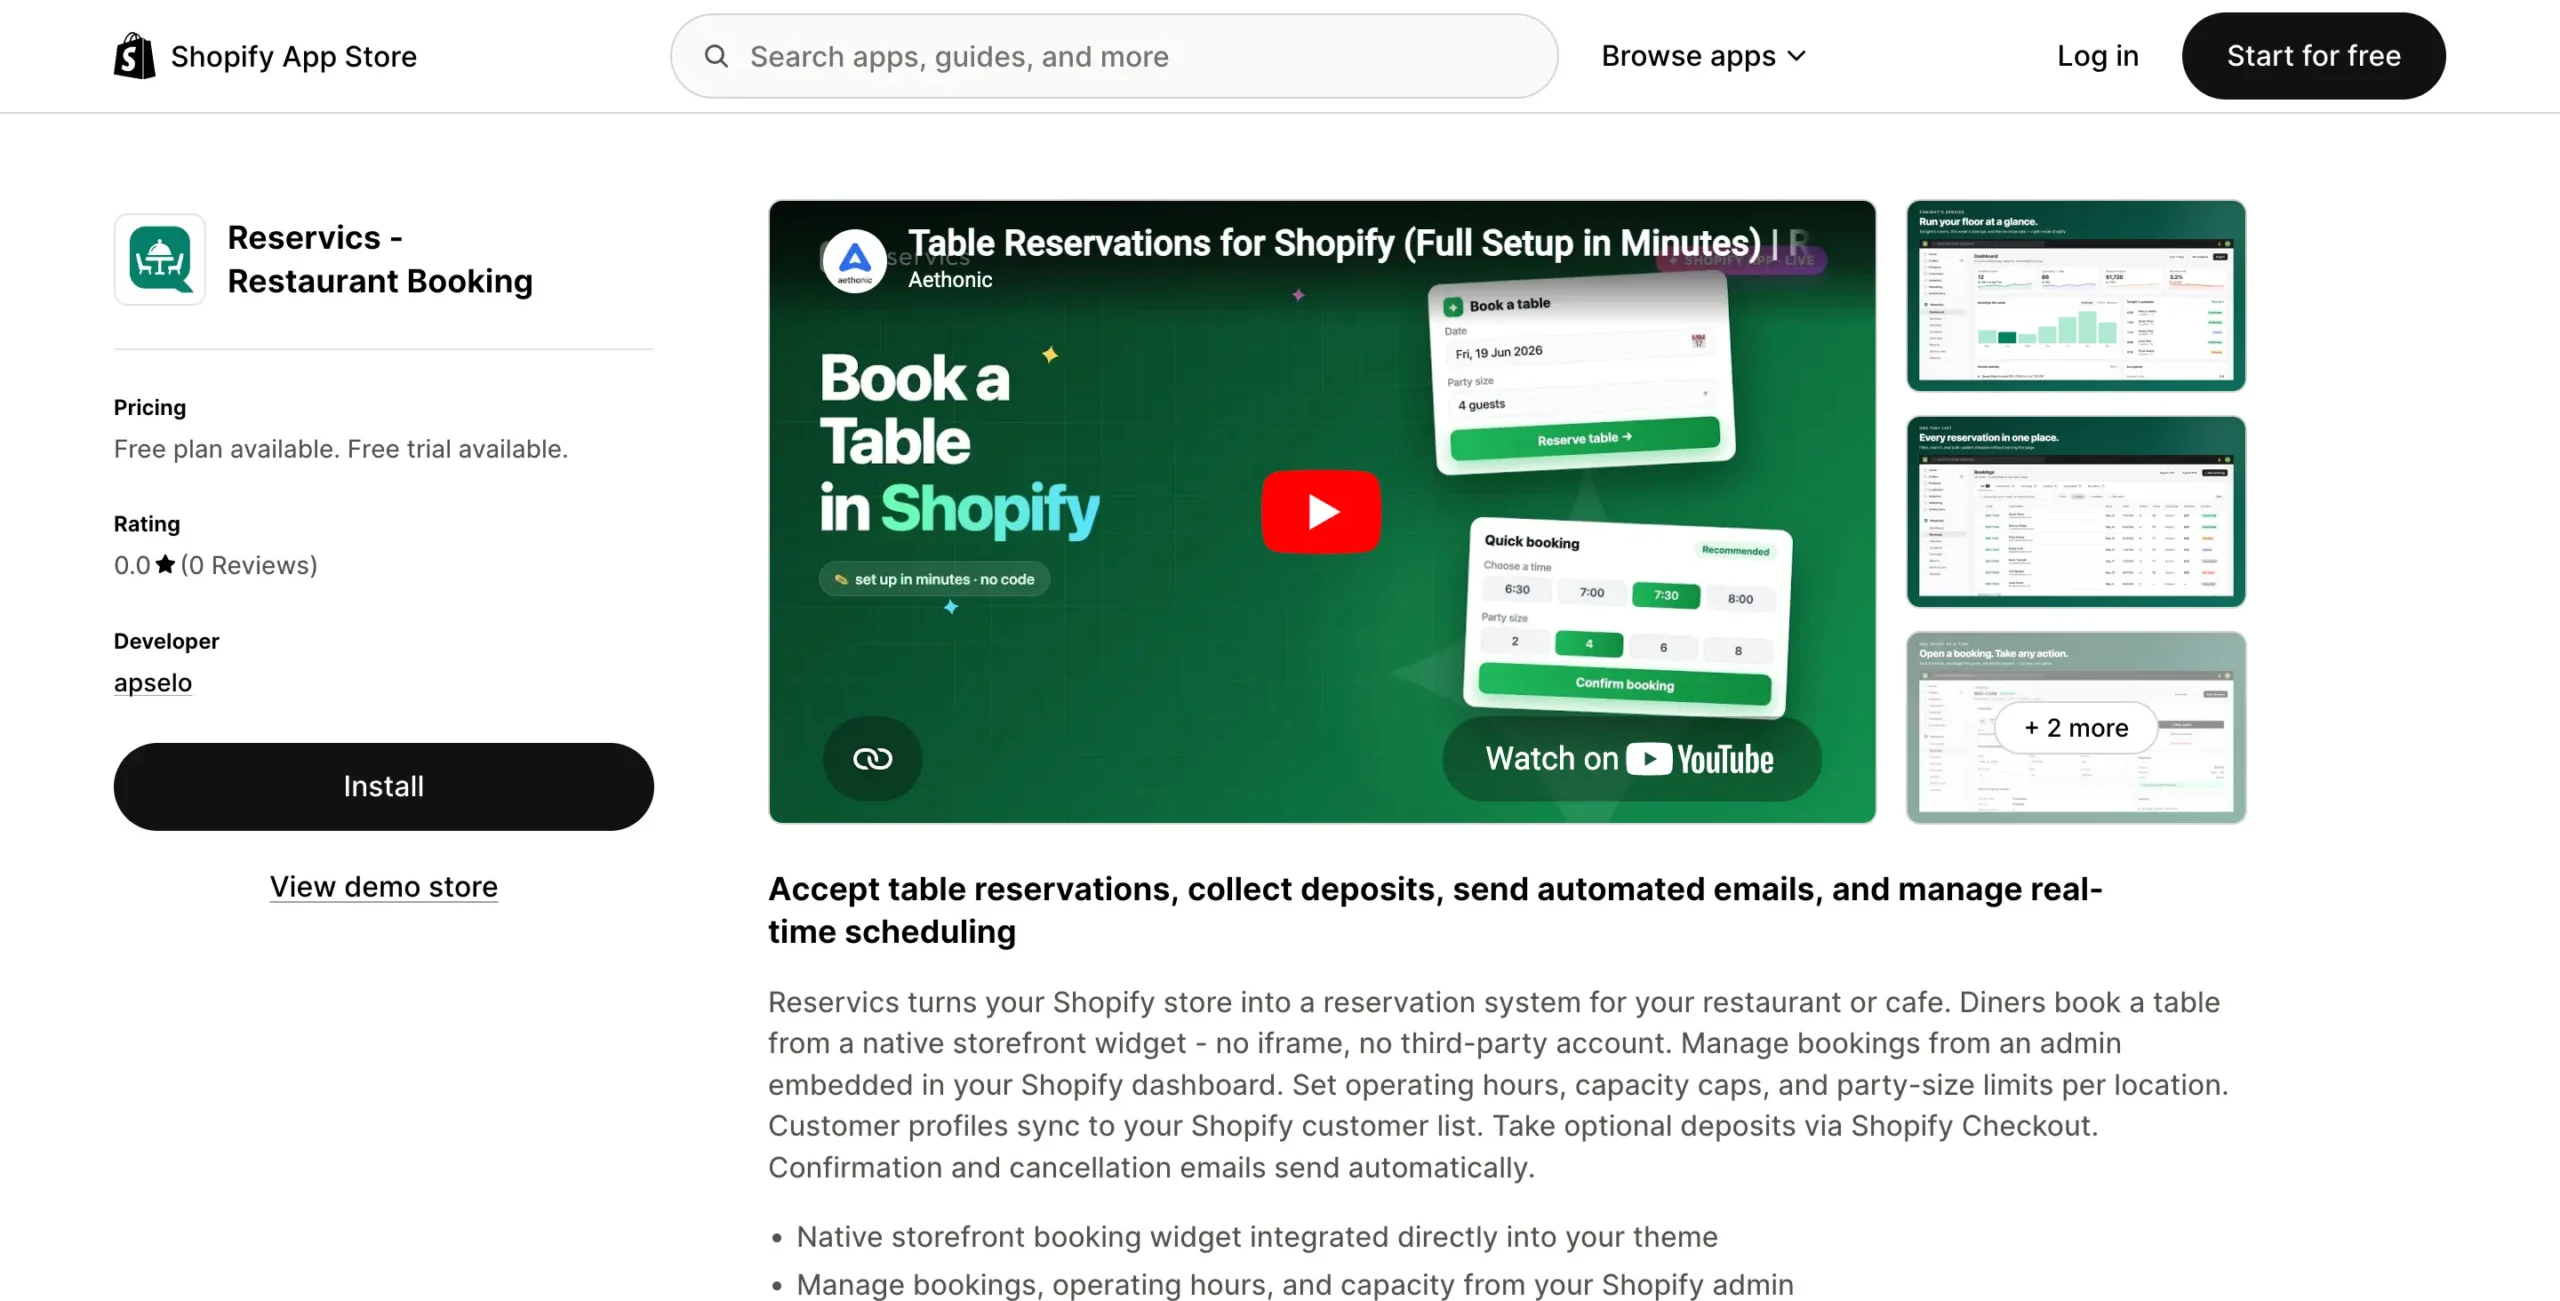
Go to the Shopify App Store and search for Reservics. Click Install and follow the permission prompts. Shopify will redirect you back to the Reservics dashboard once the install is complete.
This takes about 2 minutes.
Step 2. Set Up Your Tables and Capacity
Inside the Reservics dashboard, go to Tables and add each table with its name or number and guest capacity.
A few things to decide here:
- Do you want to combine tables for larger groups?
- Are any tables reserved for walk-ins only?
- Do you have outdoor seating that runs on different hours?
You do not need to be perfect at this stage. You can edit tables anytime.
Step 3. Configure Your Time Slots and Opening Hours
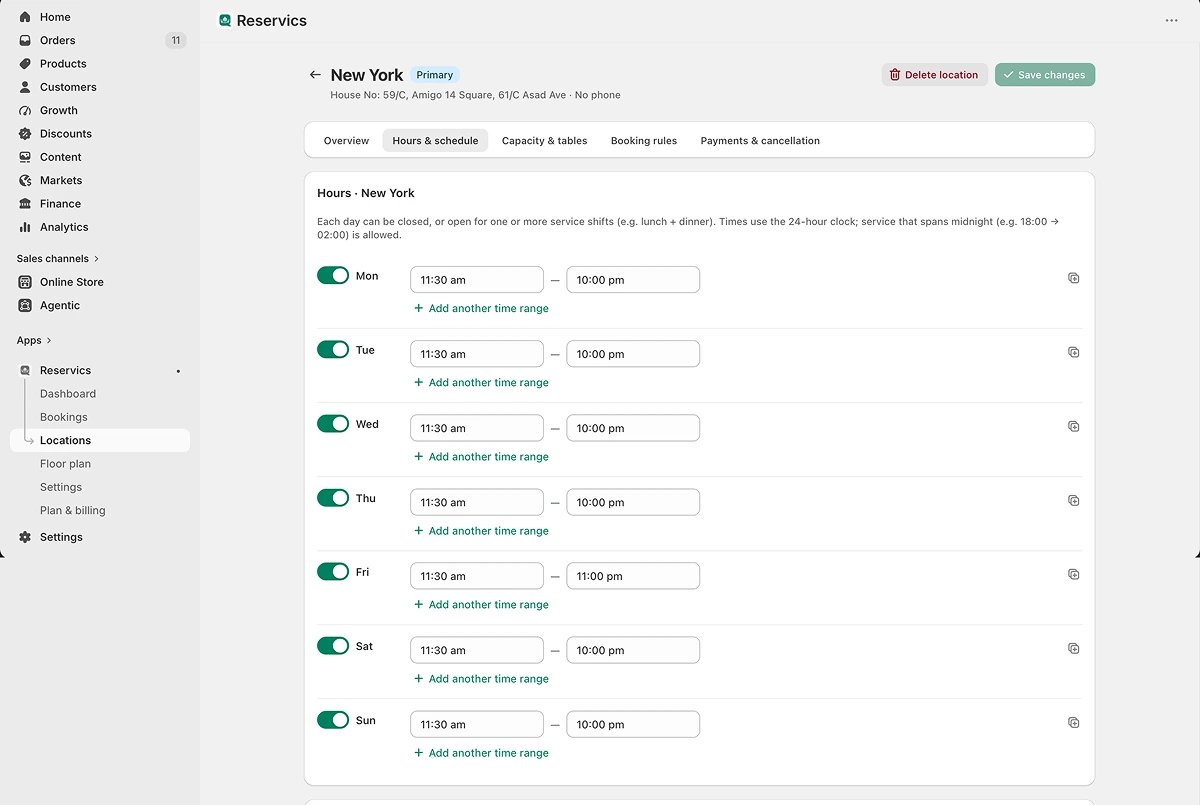
Set which days you take bookings, your service times, and how often slots open. For example: Friday dinner service, 6:00 PM to 10:00 PM, every 30 minutes.
You can also set a maximum covers per slot so you never overbook a service.
Step 4. Set Your Booking Rules
This is where you decide how guests interact with your booking system.
Deposit settings:
- No deposit (free booking, card-on-file optional)
- Partial deposit for groups above a set size
- Full prepayment for specific dates or events
Cancellation policy:
- How many hours before the booking guests can cancel for free
- What happens to the deposit after that window closes
Booking lead time:
- How far in advance guests can book
- How close to the booking time you stop accepting new reservations
Keep this simple to start. You can always tighten or loosen rules once you see how guests use the system.
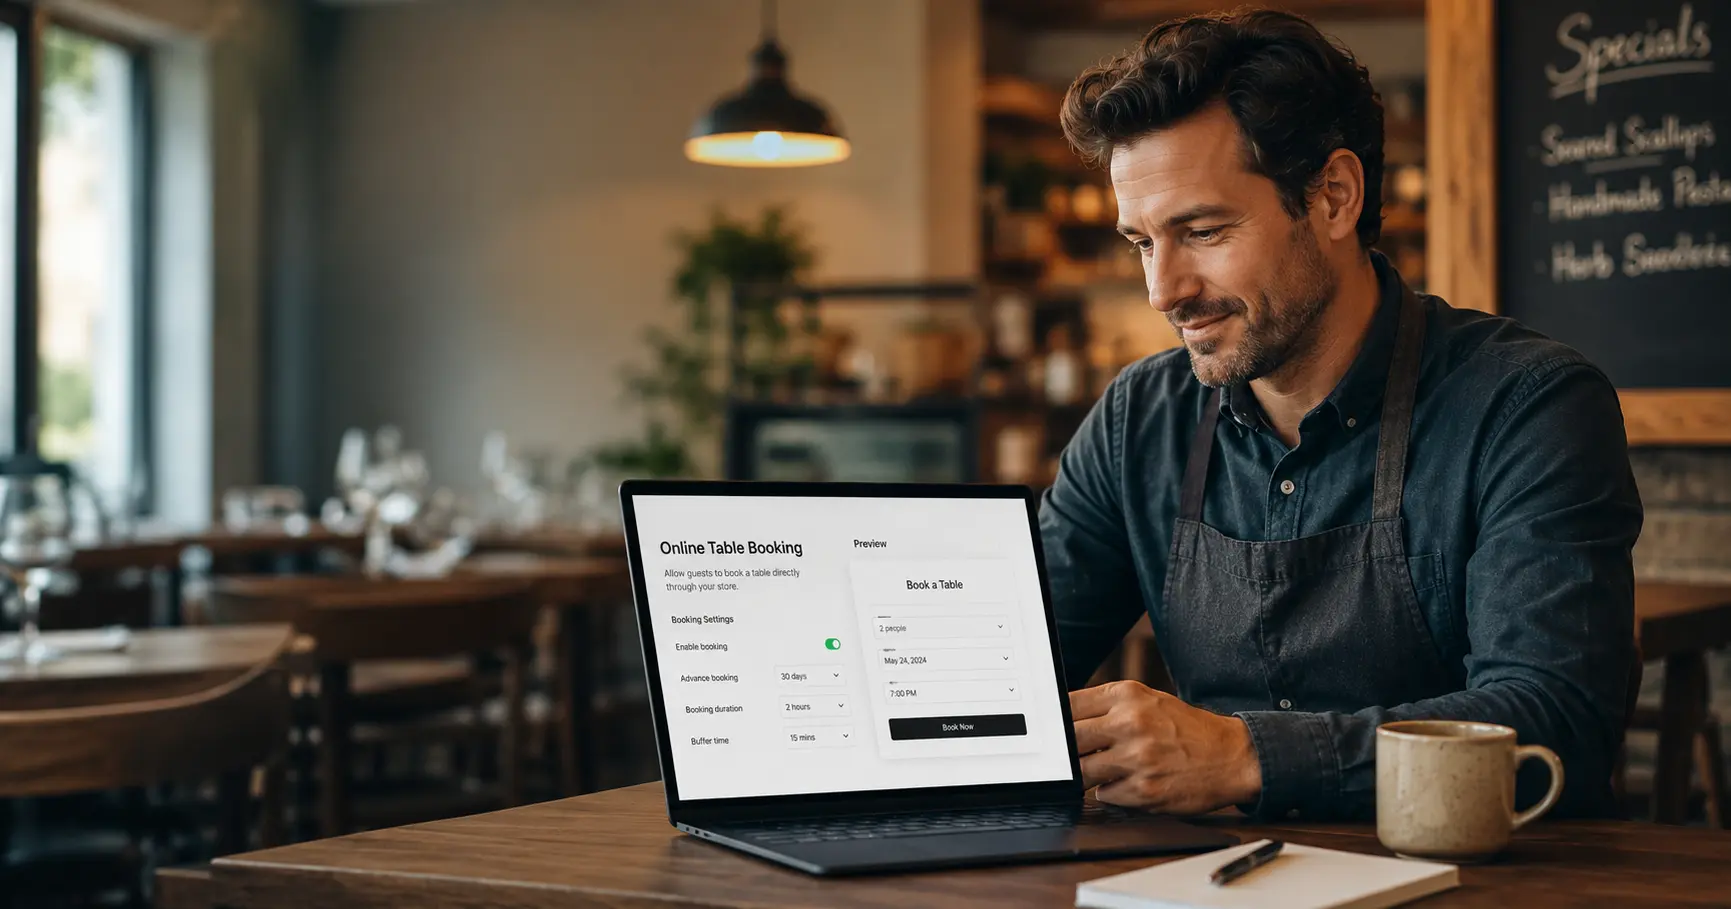
Step 5. Add the Booking Widget to Your Shopify Theme
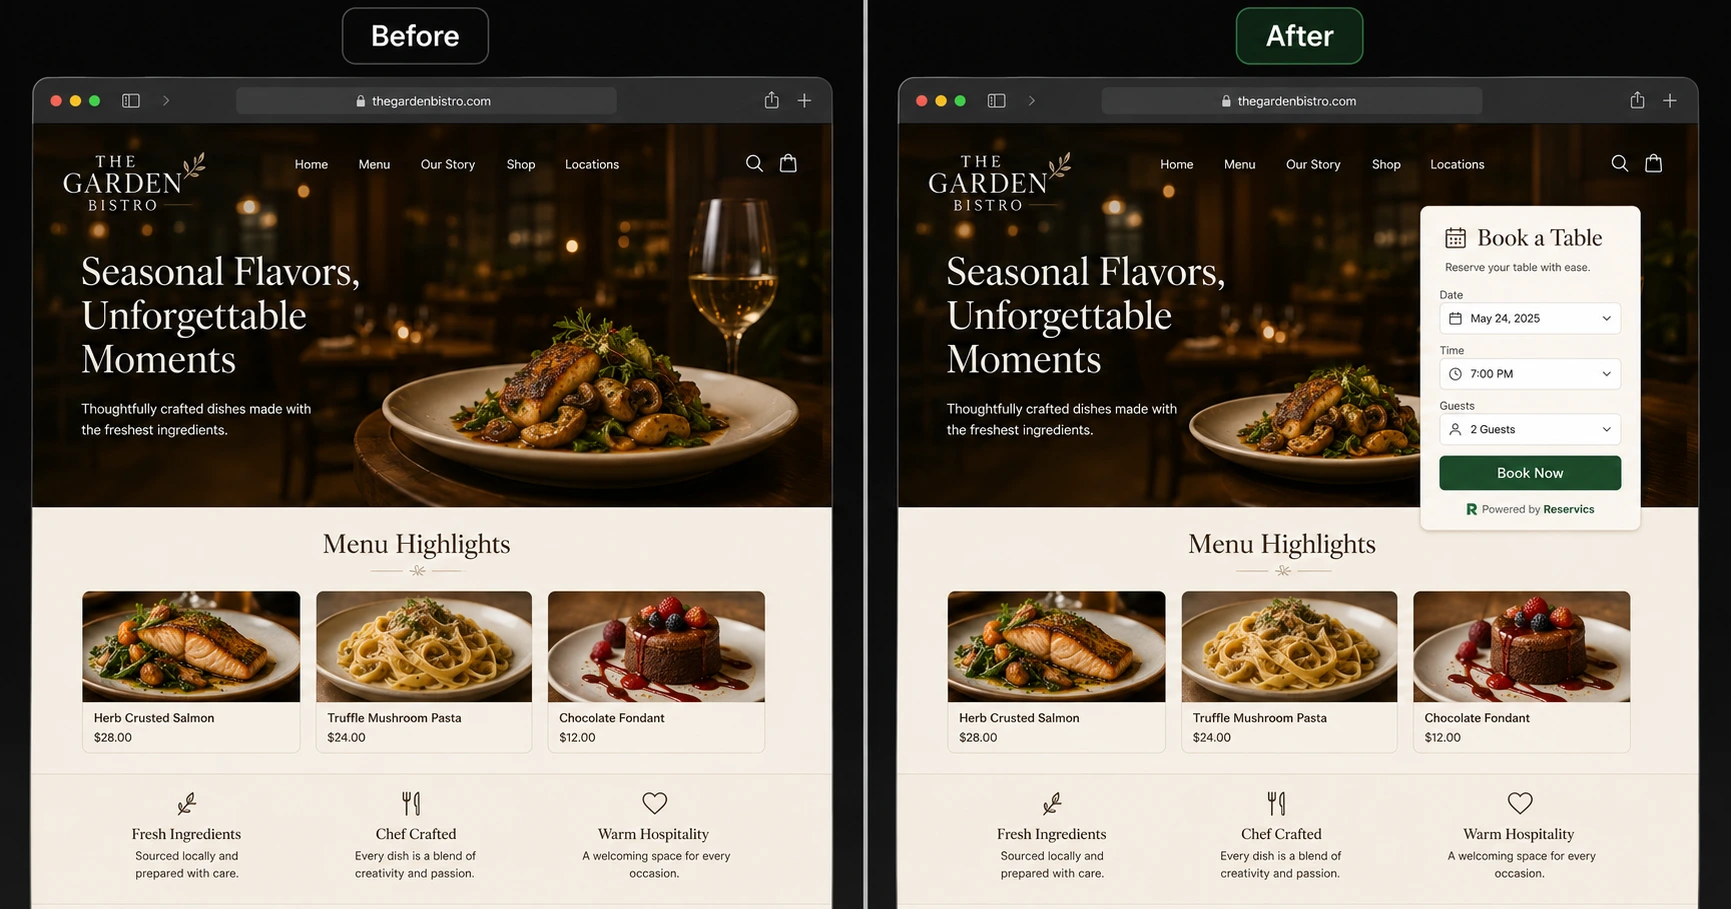
Go to your Shopify theme editor. Reservics adds a section or block you can drag onto any page. Most restaurants place it on:
- The homepage (above the fold or just below the hero)
- A dedicated Reservations page
- The navigation menu as a direct link
Once placed, the widget updates in real time based on your availability. No manual changes needed when you are fully booked.
Check the mobile version before you publish. Most guests will book from their phone.
Step 6. Set Up Confirmation Emails and Reminders
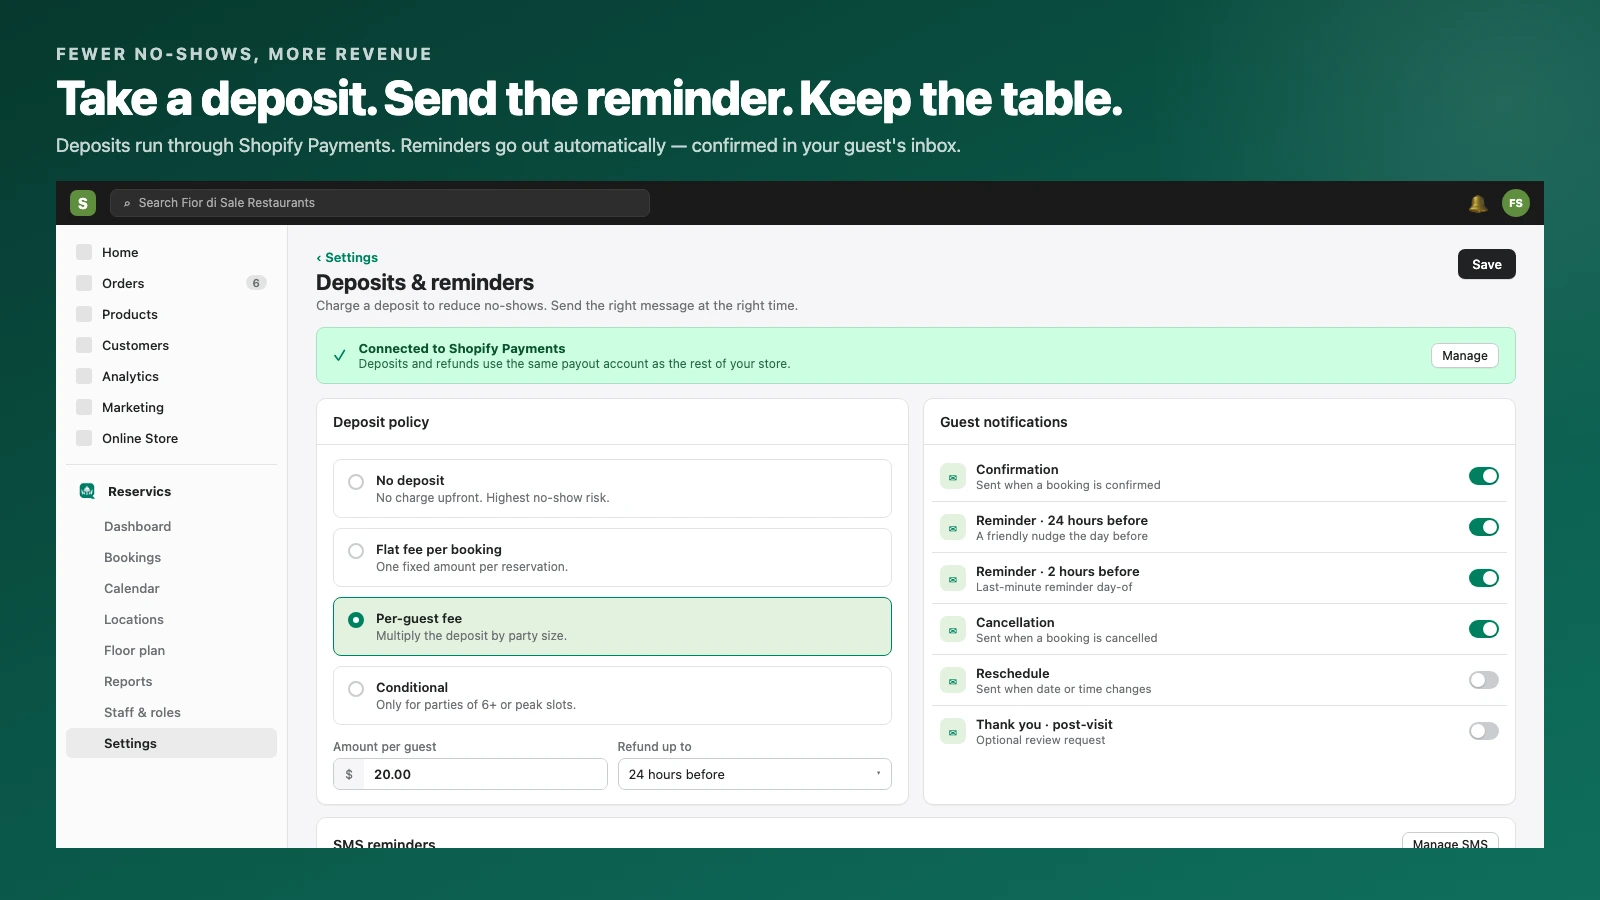
Go to Notifications inside the Reservics dashboard. Set up:
- Booking confirmation email sent immediately after a guest books
- Reminder email or SMS sent 48 hours before and again 24 hours before
- Cancellation confirmation if the guest cancels within the free window
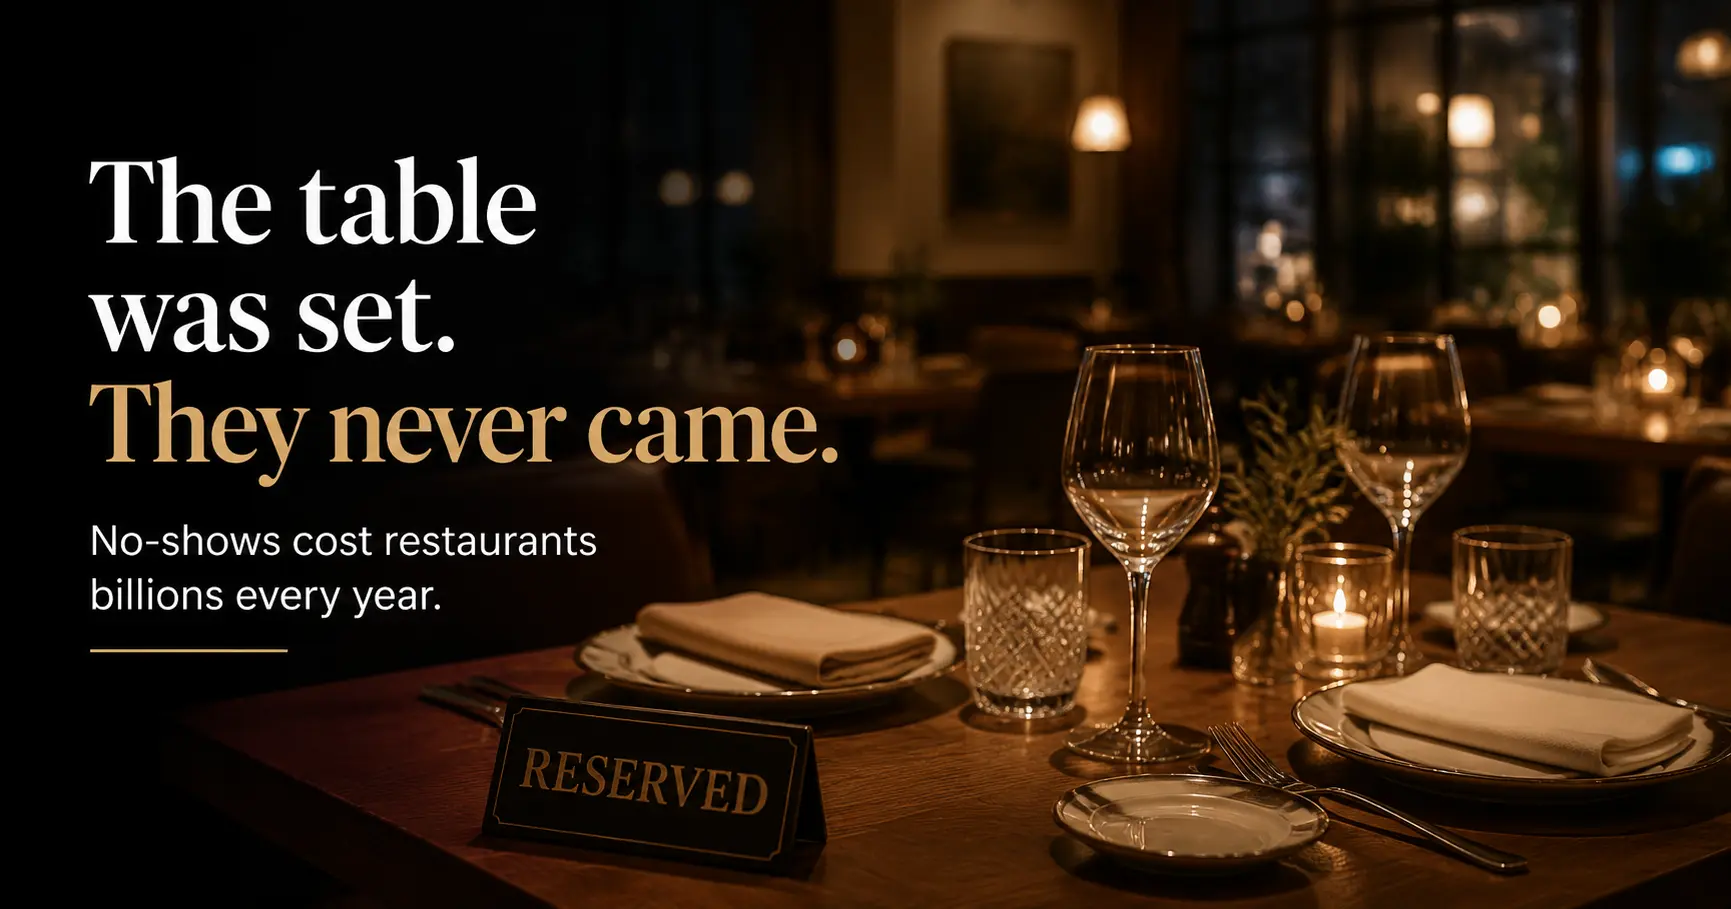
These three emails alone will reduce your no-shows before you change a single other thing.
Make sure the sender name matches your restaurant name, not a generic app name. Guests are more likely to open an email from The Anchor Restaurant than from Reservics Notification.
Step 7. Run a Test Booking End to End
Before you go live, make one test booking yourself as if you are a guest.
Check:
- Does the widget load correctly on mobile and desktop?
- Did the confirmation email arrive with the right details?
- Does the booking appear correctly in your Reservics dashboard?
- Does the cancel link work and trigger the correct email back?
Fix anything that feels unclear from a guest’s point of view. Then you are ready to go live.
Common Setup Mistakes to Avoid
Wrong time zone setting
If your Shopify store was set up in a different region, double-check that the time zone in Reservics matches your restaurant’s actual location. Guests have shown up an hour early or late because of this.
Skipping the mobile preview
Over 70% of restaurant bookings happen on a phone. Always check the widget on mobile before publishing. What looks clean on desktop can be cramped or broken on a small screen.
No confirmation email configured
Guests who do not receive a confirmation will assume the booking did not go through. They will either call to check or book again and create a duplicate. Set up the confirmation email before you take a single live booking.
Setting rules too complicated too early
Start simple. One deposit rule, one cancellation window. You can always add complexity once you understand how your guests book.
What Your First Confirmed Booking Looks Like
Once a guest completes a booking, you will see it appear in the Reservics dashboard under Upcoming Reservations. You will see the guest name, party size, table assigned, time, and any booking notes they added.
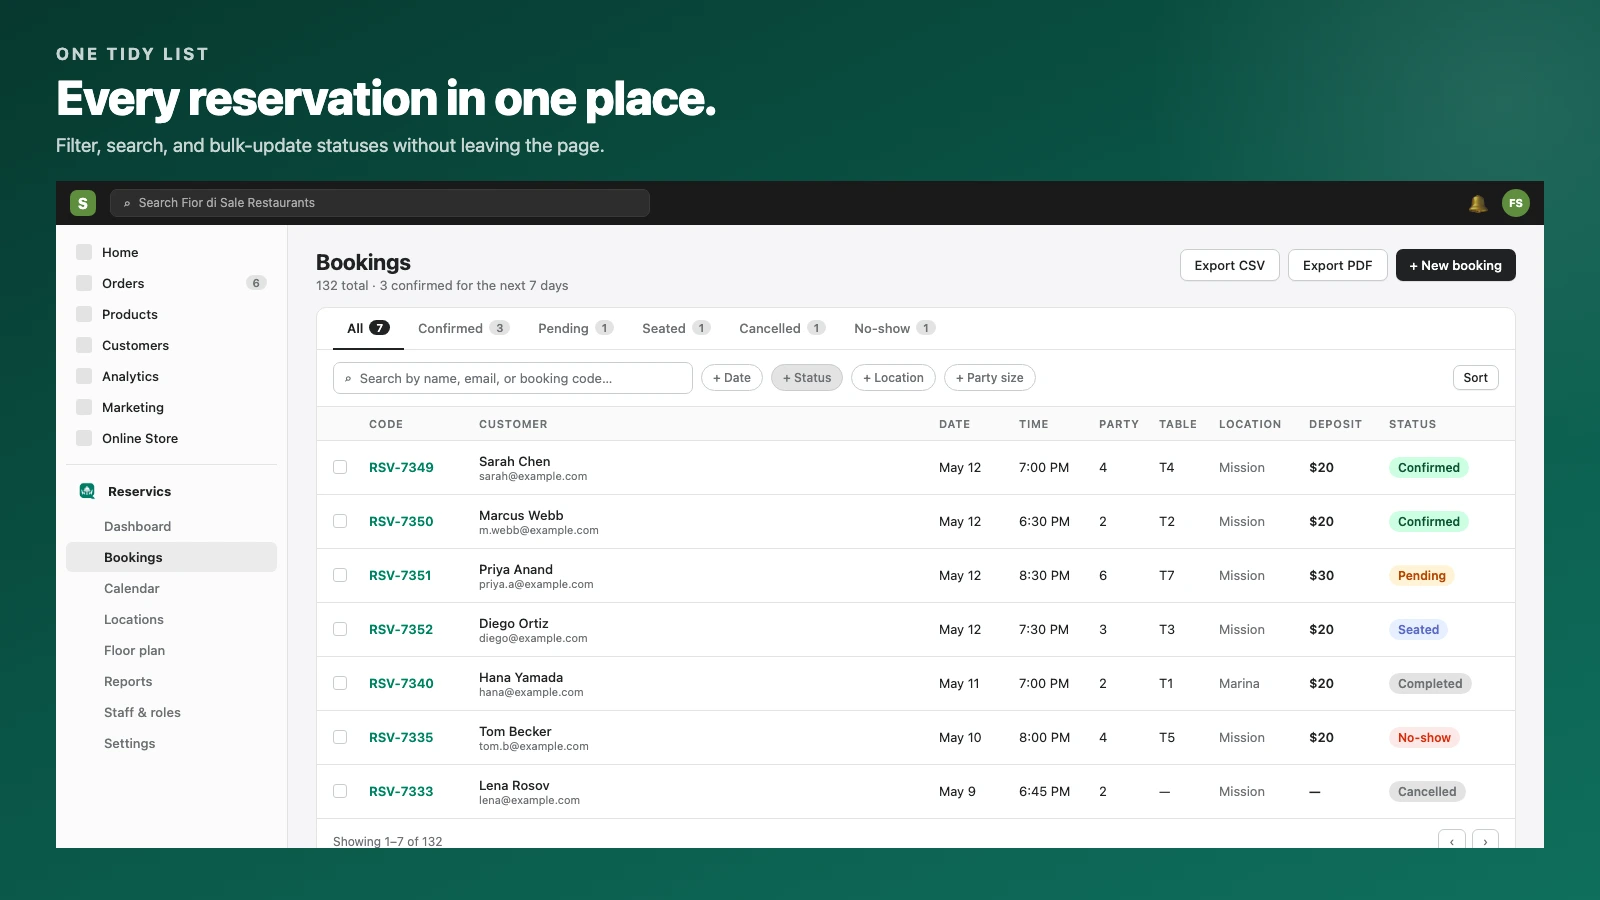
From here you can:
- View and manage all upcoming bookings in one place
- Manually adjust or reassign tables if needed
- Mark bookings as seated, completed, or no-show
- Build a guest history over time as the same guests return
The guest receives their confirmation, a reminder before the date, and an easy way to cancel or reschedule if their plans change.
That is the full loop, from booking to table to follow-up, running automatically.
FAQ
Does Reservics work with all Shopify themes?
Reservics is built to work with most standard and premium Shopify themes. The widget installs as a native section inside the Shopify theme editor. If you are using a heavily customised theme, check the Reservics documentation or contact their support before installing.
How long does the full setup take?
Most restaurants complete the setup in under 2 hours. If your table layout and opening hours are straightforward, it can take less than an hour.
Can I customise the booking form?
Yes. You can add custom fields to collect information like dietary requirements, special occasions, or seating preferences. Keep the form short though. Every extra field reduces the chance a guest completes the booking.
Do guests need an account to book?
No. Guests can book as a guest without creating an account, which keeps the process fast and frictionless.
Can I take bookings for multiple locations?
Check the Reservics documentation for multi-location support. Configuration varies depending on how your Shopify store is structured.
TLDR
- You do not need a developer to add table booking to Shopify
- Reservics installs from the Shopify App Store in minutes
- The key steps are: set up tables, configure time slots, set booking rules, add the widget, and turn on confirmation emails
- Always test a live booking yourself before going public
- Check mobile view before publishing. Most guests will book from their phone.
Ready to take your first online reservation? Install Reservics on Shopify